https://firebase.google.com/?hl=ko
Firebase
Firebase는 고품질 앱을 빠르게 개발하고 비즈니스를 성장시키는 데 도움이 되는 Google의 모바일 플랫폼입니다.
firebase.google.com
이 사이트에 들어가서

1. "시작하기" 버튼을 누릅니다
2. 구글 로그인을 해줍니다.
3. "프로젝트 추가" 버튼을 눌러줍니다.
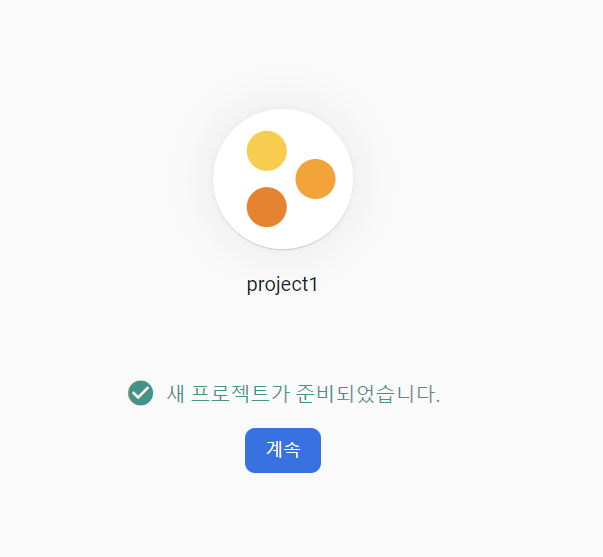
4. 프로젝트 이름을 입력한 후

5. 프로젝트 생성 완료!
6. 안드로이드 버튼 클릭

7. 앱 등록하기


8. "goole-services.json"파일을 안드로이드 스튜디오로 만든 프로젝트>app안에 옮겨줍니다.

9. 안드로이드 스튜디오에 파일이 잘 들어 갔는지 볼까요?

잘 들어 갔네요~ 이제 그다음 sdk를 추가해볼게요


10. 자바 언어를 선택해줍니다~ 그 후, 여기에 적혀져 있는 코드들을 gradle 폴더에 복사해주면 돼요~!
제가 넣은 코드를 보여드릴게요
11. Gradle Scripts > bulid.gradle (Project: My_Application)에 들어가줄게요.

소스코드
// Top-level build file where you can add configuration options common to all sub-projects/modules.

buildscript {
    repositories {
        // Make sure that you have the following two repositories
        google()  // Google's Maven repository

        mavenCentral()  // Maven Central repository

    }
    dependencies {
        // Add the dependency for the Google services Gradle plugin
        classpath 'com.google.gms:google-services:4.3.15'

    }
}


plugins {
    id 'com.android.application' version '7.3.1' apply false
    id 'com.android.library' version '7.3.1' apply false
}
11. Gradle Scripts > bulid.gradle (Module: My_Application.app)에 들어가줄게요.


소스코드
plugins {
    id 'com.android.application'
    id 'com.google.gms.google-services'
}

android {
    namespace 'com.example.myapplication'
    compileSdk 33

    defaultConfig {
        applicationId "com.example.myapplication"
        minSdk 21
        targetSdk 32
        versionCode 1
        versionName "1.0"

        testInstrumentationRunner "androidx.test.runner.AndroidJUnitRunner"
    }

    buildTypes {
        release {
            minifyEnabled false
            proguardFiles getDefaultProguardFile('proguard-android-optimize.txt'), 'proguard-rules.pro'
        }
    }
    compileOptions {
        sourceCompatibility JavaVersion.VERSION_1_8
        targetCompatibility JavaVersion.VERSION_1_8
    }
}

dependencies {
    implementation platform('com.google.firebase:firebase-bom:31.2.0')
    implementation 'com.google.firebase:firebase-analytics'
    implementation 'com.google.firebase:firebase-auth-ktx'
    implementation 'androidx.appcompat:appcompat:1.6.0'
    implementation 'com.google.android.material:material:1.8.0'
    implementation 'androidx.constraintlayout:constraintlayout:2.1.4'
    implementation 'com.google.firebase:firebase-database:20.1.0'
    testImplementation 'junit:junit:4.13.2'
    androidTestImplementation 'androidx.test.ext:junit:1.1.5'
    androidTestImplementation 'androidx.test.espresso:espresso-core:3.5.1'
}
그 다음 화면 위쪽에 "sync now"가 뜨면 다운받아주면 됩니다

"콘솔로 이동" 클릭하면 끝!
'개발일지 > 안드로이드 JAVA' 카테고리의 다른 글
| firebase로 안드로이드 스튜디오 연결하기 [2탄] (0) | 2023.02.10 |
|---|---|
| [안드로이드 프로그래밍 7판] 실습 6-2 간단 웹브라우저 앱 만들기 (0) | 2023.02.09 |
| [안드로이드 프로그래밍 7판] 예제 6-15,16 ViewFlipper (0) | 2023.01.31 |
| [안드로이드 프로그래밍 7판] 실습 6-1 날짜/시간 예약 앱 만들기 (0) | 2023.01.31 |
| [안드로이드 프로그래밍 7판] 직접 풀어보기 5-2 (0) | 2023.01.15 |


